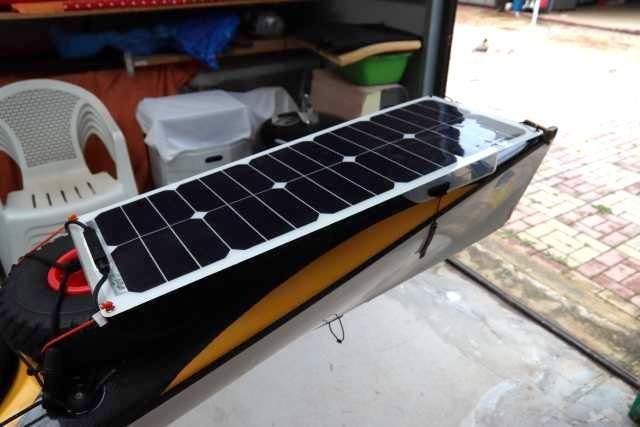
Before starting with the description of the photovoltaic setup, I want to immediately clarify one thing: not everyone needs to install a solar panel on sea kayak to produce energy. The reasons are at least two.
- Nowadays, very large power-banks (even over 20,000 mah) are on the market at a low price, which can store enough energy to recharge all the electrical accessories that a kayaker brings with him during a trip, even for more days. Two or more of these power-banks can solve the problem of supplying electricity for long trips, even 4/5 days;
- Travels in areas so remote that you have no chance of using an electrical outlet to recharge your accessories are very rare. Even for very long trips, with durations of the order of weeks, it is often possible, by landing on beaches where there is even a small bar, to ask the manager for the pleasure of recharging accessories or power-banks during the night.
Done this premise, we can easily identify now the type of travel that requires (or is recommended for) the presence of a photovoltaic generation system on your kayak:
- trips of more than 4/5 days in remote areas, with no possibility of using electrical outlets;
- very long trips during which we often need to recharge high energy-consuming accessories such as tablets, drones, etc.
I won’t hide from you that since I started taking the drone with me on my trips, I immediately felt the need to have an electric generation system on my kayak. During the Tour of the Balearics , in 2018, I was forced to find, after each flight, an electrical outlet to recharge the drone’s batteries. Reason why I limited its use to the bare essentials.
We come now to the topic of this post.
TABLE OF CONTENTS
Photovoltaic generators
In recent years, progress has led to a dizzying increase in electrical / electronic devices that a kayaker carries on a trip. We have the smartwatch, the GPS, the VHF radio, the mobile phone, the tablet, the camera, the action-cam, the drone, the front flashlight and whoever has more. The energy requirement has increased accordingly and if for some reason we do not have access to an electrical outlet at least once a day we risk serious trouble. From this need arises the need for a photovoltaic generation system to be used during a trip. There are basically 2 types:
- portable generator to use on the ground
- waterproof sailing generator
The second type has two subcategories:
- with inboard energy storage
- with outboard energy storage
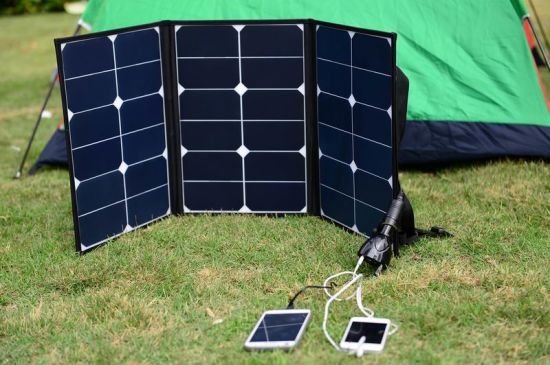
The first type is the cheapest and easiest to use. On the market there are folding solar panels that, if necessary, can be opened to the sun and connected to the device or power-bank to recharge it. The power can even reach 100W, it depends on how many modules it is composed of.
During a kayak trip, however, we spend most of the daytime at sea and often when we landing we have little time to think about recharging the devices with the solar panel. In the event of significant energy needs, therefore, we do not have enough time to devote to recharging the devices unless we sacrifice precious time for navigation to electric recharge.
In this case, we either have the possibility of connecting to a power outlet (perhaps deciding to spend the night in non-isolated places) or we have to use a photovoltaic navigation generator that allows us to take advantage of all the daytime hours and the considerable solar radiation on the surface of the sea.
The navigation photovoltaic generator is essentially made up of a waterproof solar panel fixed on the kayak deck and an inboard or outboard energy storage system . In the first case we can choose a non-waterproof storage system but we have to drill the hull to connect it to the panel (compromising the structural impermeability of the kayak). In the second case we have to have a waterproof storage system but we don’t have to drill the hull to connect it to the panel.
The last solution is certainly the least invasive but it is more difficult to implement technically. And this is what we will deal with.
Solar panel for sea kayak:
which kit to choose?
To install a navigation photovoltaic generator with outboard storage on the kayak , the most delicate phase of all is the choice of components. I want to start by saying that you will find very few photovoltaic kits on the market built specifically to be installed on kayaks , least of all on sea kayaks. There is little demand that could justify the marketing of a specific product.
The 17W solar kit by “Voltaic”
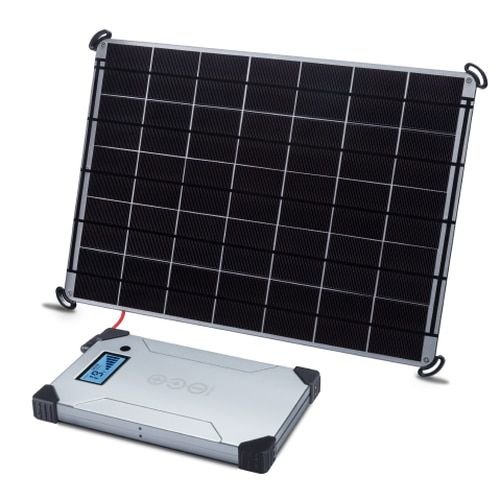
A kit you can buy is the 17W Voltaic kit . It includes a 17W solar panel and a 28,000mah lithium-ion battery and costs $ 259 at the time of writing. However, you need to add a watertight box from the additional cost of $ 59. In total it is 320 $ to which we must add the shipping and customs taxes as the company is based in the USA. The cost thus rises to over € 400.
The self-made 35W kit
If we want to get by ourselves, we can build, as I will explain later, a photovoltaic kit that is twice as powerful and costs less than € 200!
Solar panel for sea kayak:
guide to the choice of the components
The main difficulty we will have to face is to choose water-resistant components and if they are not, to make them resistant by means of the precautions. In kayak we will need total protection against sand and dust and effective protection against splashes and even against a brief immersion under the surface of the water (in case of capsizing). The risk that we must avoid is that sand or water comes into contact with the electrical / electronic circuits of the system components. Let’s take a look at the IP standard, which is the security standard we will encounter most often when choosing our components.
IP – index of protection (against solid objects or against liquids)
The index of protection – the IP – is an essential characteristic of most of the electrical devices. The IP – index of protection – shows the protection rate of the device from any external agents. It is composed of IP and 2 numbers, which show:
- the first digit describes the degree of protection rate against solid objects, dust, the solid particles and bodies;
- the second digit describes the degree of protection offered against liquids.
The IP rating is valid when the environment conditions are standard; in special cases and hazardous environments (intense heat, mines, etc), special protection is required.
The first IP digit – protection against solid object.
- IP0X – No protection from solid bodies, no solid protection;
- IP1X – Protection from the objects with a diameter larger than 50 mm.
- IP2X – Protection from the objects with a diameter larger than 12 mm.
- IP3X – Protection from the objects with a diameter larger than 2.5 mm.
- IP4X – Protection from the objects with a diameter larger than 1 mm.
- IP5X – Protection from the harmful levels of dust. The dust is not fully stopped from entering in, but it’s intrusion does not block the normal activity of the device.
- IP6X – Total protection from dust.
The second IP digit – protection against liquids, water.
- IPX0 – No special protection against water or liquids;
- IPX1 – The enclosure provides protection from vertical falling water only, the vertical drops of falling water will not enter in;
- IPX2 – The enclosure provides protection from water falling at up to 15° from vertical; the vertical drops of water have no effect on it, when the device is tilted up to 15° from the normal position;
- IPX3 – The enclosure provides protection from water falling at up to 60° from vertical; the vertical drops of water/water spray have no effect on it, when the device is tilted up to 60° from the normal position;
- IPX4 – The enclosure provides protection from water splashed from all directions;
- IPX5 – The enclosure provides protection from low pressure water jets, like a nozzle;
- IPX6 – The enclosure provides protection from high pressure/powerful water jets, like the sea water, from any direction;
- IPX7 – The enclosure provides protection from temporary submersion in water, up to 1m in depth, when the device is either dropped or placed in water for a limited time and depth=1m;
- IPX8 – The enclosure provides protection from liquids and water for an extended set time of submersion in water, up to a specified depth;
The minimum index of protection we need is an IP6X for solids and an IPX7 for liquids. Therefore all our components must have at least an IP67 index of protection . Components with a higher degree of protection than IP67, especially as regards protection against liquids, are recommended if they are commercially available at reasonable prices.
Solar panel for sea kayak
The solar panel is certainly the most important component of the whole system and is also, in spite of ourselves, the most difficult component to find. Before installing a solar panel on sea kayak we must verify that it has the following characteristics:
- minimum index of protection IP67 . This is especially true for the junction box, where the contacts of the individual cells converge and are connected to the two cables that come out of the box.
- lightness (it must not exceed 1kg of weight)
- high efficiency . We do not have a large surface available to install it on, so we will have to opt for panels that produce a lot of energy per unit of surface.
- impact resistance . Our panel must be able to withstand, on the surface, accidental impacts against objects and, along the edges, also impacts against boulders and rocks.
- width smaller than the maximum width of the kayak . This does not necessarily mean that our panel will not protrude laterally from the shape of the kayak, but that it will have such a width that it does not protrude significantly, it does not hinder the paddler’s maneuvers and does not offer excessive resistance to the roll to be performed after an accidental capsizing. A panel less than 30cm wide will be fine for this.
The panel that comes closest to our ideal solar panel for sea kayak is the one built to be installed on boats . These panels have an IP67 index of protection, therefore excellent for our purpose. They are flexible and this ensures a high lightness (they are without frames and the cells are covered with a plastic layer rather than unbreakable glass). They can have monocrystalline, polycrystalline or amorphous silicon cells. The first two types of cells have high efficiency while the last type has poor efficiency and is not good in our case as the surface available on a boat for the installation of the panels is much greater than the narrow one that we have on our kayak.
So our choice must fall on a nautical solar panel with monocrystalline or polycrystalline silicon cells. Unfortunately is not easy to find nautical panels less than 30cm wide. After long research I managed to find a 28.5cm wide monocrystalline silicon marine panel. The German company OffGridTec builds it and it can be purchased online here at a price of less than 100 €.
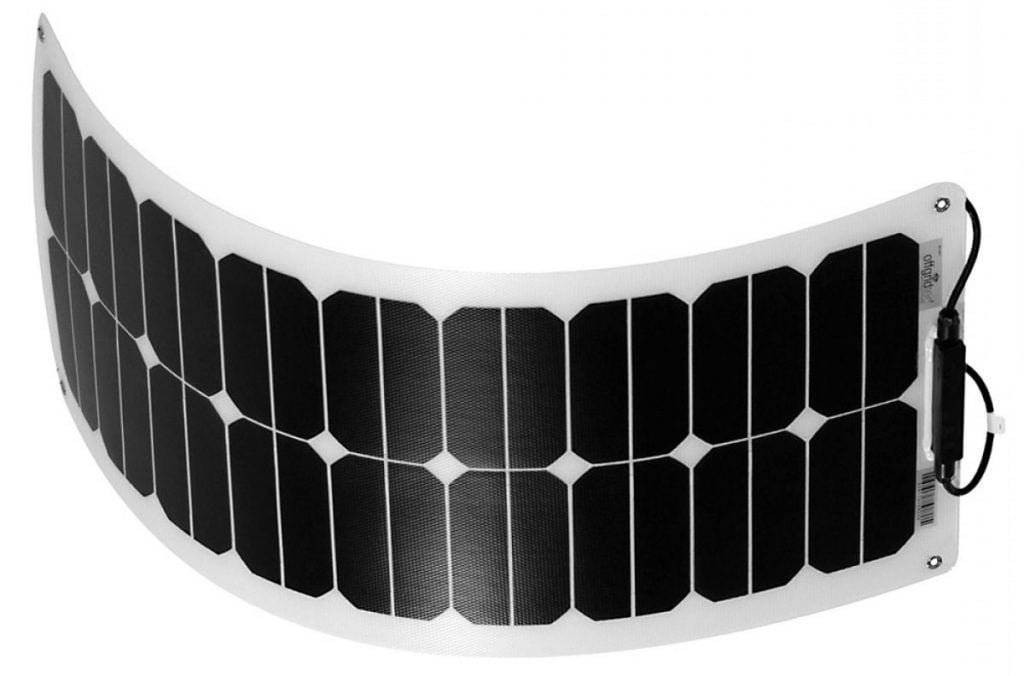
It’s a 35W monocrystalline silicon panel, flexible up to 20°, equipped with IP67 index of protection, 28.5cm wide, 75cm long and 600g heavy. It is also equipped with 4 eyelets, very useful for the type of fixing we are going to do on the kayak deck.
Battery
Normally for isolated photovoltaic systems, it means disconnected from the grid, as in our case, AGM lead batteries, gel or the more expensive lithium batteries are used. These, apart from the disadvantage of the higher cost, have the following advantages compared to the lead ones:
- less weight with the same storage capacity
- smaller footprint for the same storage capacity
- no exhalation
- faster charging and discharging speed
- greater charging efficiency
- duration
There is therefore no doubt about which type of battery to use. A common power bank equipped with lithium batteries will be more than good for our needs . Given that the solar panel is able to recharge the entire battery pack during a day of navigation, we will have to choose a charging capacity that allows us to recharge overnight all the electrical / electronic accessories that make up our equipment. The advice that I feel to give you, also based on my personal experience, is to use 2 power-banks of at least 15,000 mah . The average cost of a 15,000mah power bank is € 25 at the time of writing. In this way we will have enough charge to recharge all our devices, even the most energy-consuming, and we will have a spare power bank in case of malfunction of one of the two.
The output voltage from a power bank is normally 5V. There are some, especially those that also function as car starters, which also have a 12V output, useful for recharging through appropriate notebook adapters, drone batteries and reflex cameras.
I personally use a 15,000 mah starter with 5V and 12V outputs. The latter can recharge the drone batteries (13V input) through a special step-up DC / DC voltage transformer.
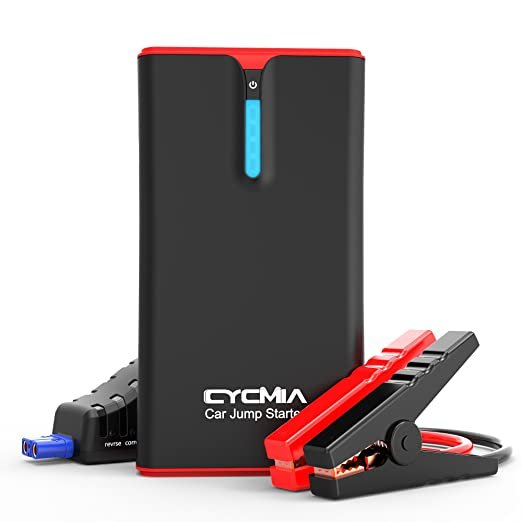
We should try to use in kayak only rechargeable devices via USB 5V ports. Where they are not, we must have adapters capable of exploiting the 5V output of the USB ports or at most the 12V output of our power-bank (if present).
Waterproof box
Common power banks do not have IP67 protection. This implies that we will need a waterproof box, with IP67 index protection, where to allocate our battery and connect it to the cables coming out of the panel.
The shape and size of the box depend a lot on the type and number of batteries it will contain. In principle, also taking into account the limited space available on the deck of our kayak, a 25x15x10cm box will do more than well to accommodate two power banks inside .
Among the best waterproof boxes on the market are those of the Pelican company . They are robust and equipped with all the necessary certifications. The 1150 Protector Case model has dimensions that are very close to those that we have identified above. The price is not cheap and varies from € 50 to € 65.
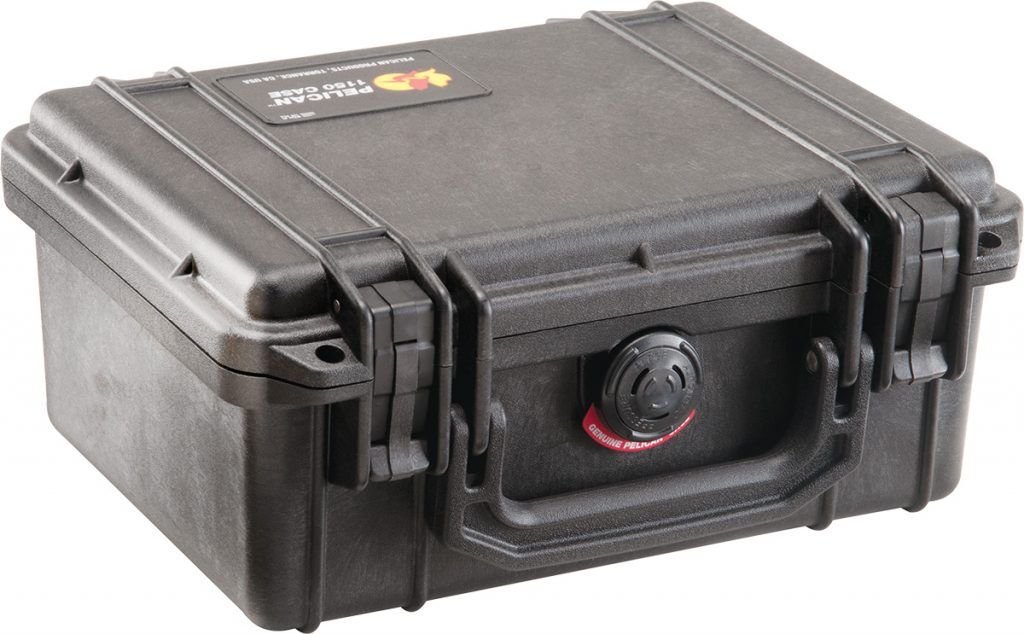
An inexpensive alternative is to use liquid food storage container.

They do not have an IP certification but by their nature they must contain liquids without letting them escape. So, even if the opposite is true, and being also equipped with rubber o-rings between the body and the cover, they can be fine for our purpose. Personally, I use one of the Lock & Lock which turned out to be absolutely waterproof during the numerous diving tests to which I underwent it. The model is the 2.3L iSi HPL 825 . The cost is € 12.
DC/DC converter
The solar panel on sea kayak supplies variable voltage direct current. For the type of solar panels that interest us, the output voltage, in optimal operating conditions, is about 12V. The lithium battery of the power-bank is recharged with 5V direct current. A step-down DC-DC adapter is therefore needed which lowers the voltage down to 5V. There are many on the market but those with IP67 certification are practically nowhere to be found. However, the fact of being positioned inside the waterproof box, makes our waterproofing requirements less stringent.
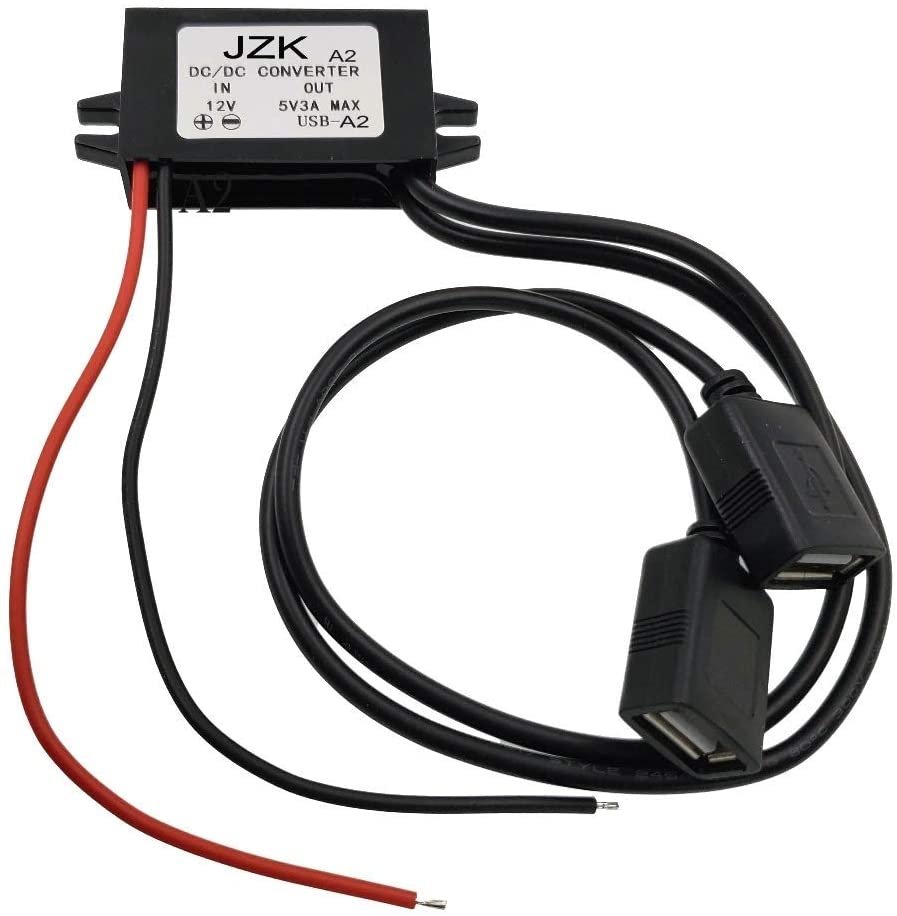
There are adapter on the market really small, equipped with double USB output port (to recharge 2 power–banks at the same time) and with circuitry protected by a waterproof casing (they do not have certification, however). The cost is around 10 €. They are our ideal candidates for lowering the output voltage to 5V and recharging lithium batteries. The maximum output power is 15W (5V x 3A), more than enough to fully recharge our power-banks during a day of navigation. They work with input voltage varying between 8V and 22V, perfect for our panel which has a maximum output voltage of about 21V. Anyone who wants can install 2 of them and take advantage of almost all the power of the panel which is 35W. Remember, however, that the panel will almost never deliver maximum power, but this will help us to have enough power even on days and times with less than optimal sunshine. Making a rough calculation, our system with a single adapter will deliver 5V 3.000ma and will be able to recharge the two 15.000mah power-banks in 13 hours (considering a 30% loss in power-bank input).
15,000 * 2 * 1.3 / 3,000 = 13.
Connection of the components
The solar panel cables on the kayak end with two IP67 certified MC4 connectors, one male and the other female.
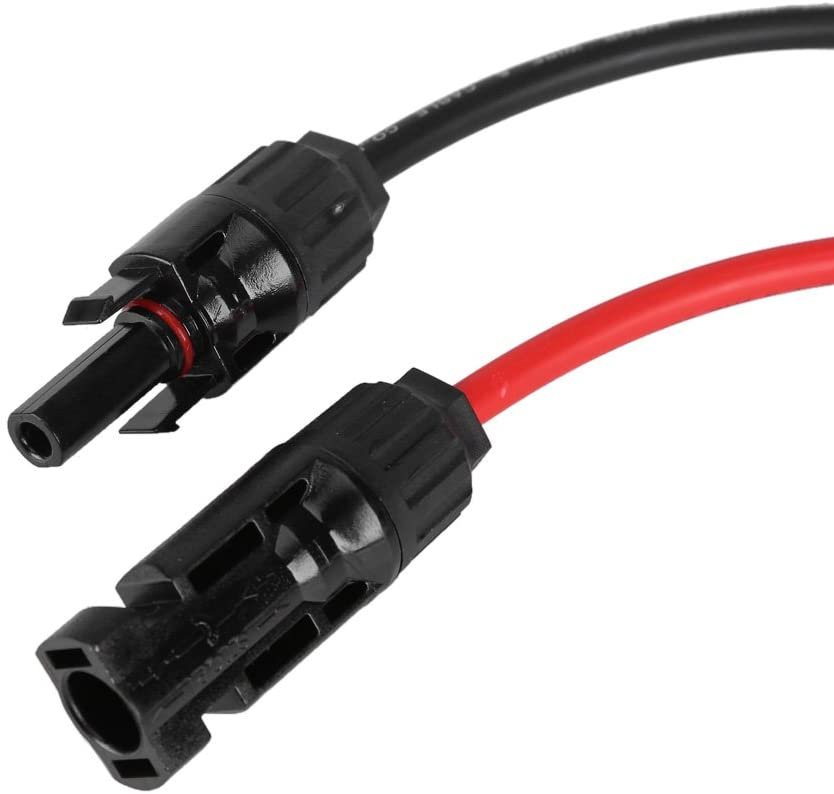
Wanting to make the waterproof box disconnectable from the panel , so that we can view it or take it to the tent to recharge our devices overnight with the two power banks contained therein, we need two more MC4 connectors. To be sure of their watertightness, it is advisable to buy them already welded to the cables.
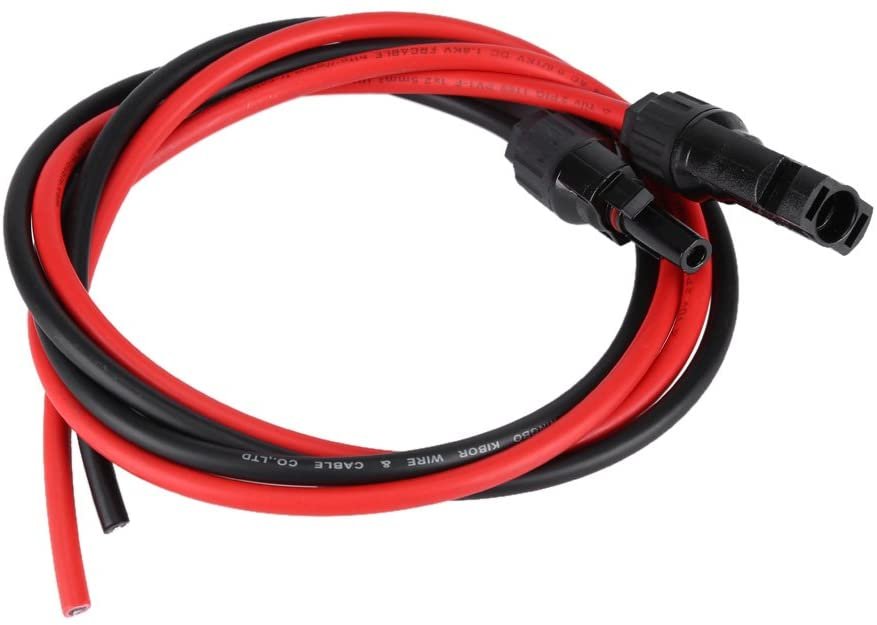
We can buy them on internet without problems, here for example. The cost is € 15.
Without this arrangement it would be impossible to carry out the next step, that is the passage of the cables inside the waterproof box through IP68 watertight cable glands (for solar cables with 6mm external diameter). They cost a few euros in packs of 10 or more.
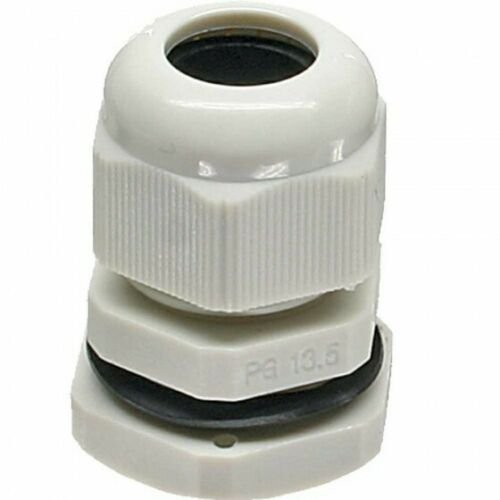
The MC4 connector is in fact too big to pass through the cable gland. We can pass the 6mm solar cable without problems instead. To mount the two cable glands, we need to drill two holes in the box, of the same diameter as the cable gland, with a drill, and then tighten the two nuts to stop the o-ring.
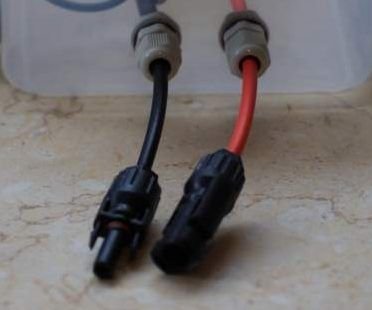
It’s time to check the watertightness of the cable glands. We close the box and immerse it (without immersing the MC4 connectors, however) in a bucket full of water for a couple of minutes. Then we check that no water has entered inside.
Once this is done, we can cut the solar cables in the waterproof box and connect them to the adapter input cables. We must try to make this connection between cables of different diameters as watertight as possible. We can use waterproof heat shrink tubing for this purpose .
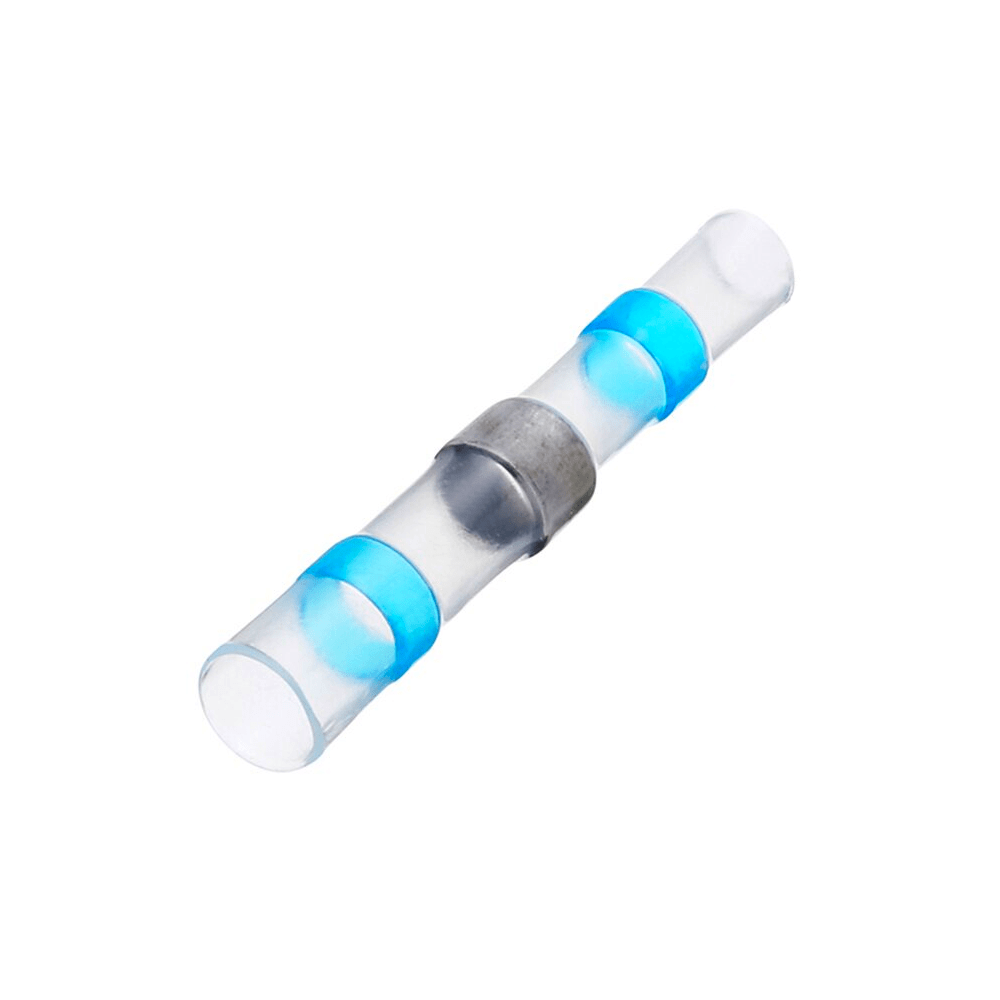
We can buy it or self-build it using tin wire and heat shrink tubing (here is a tutorial).
After making all the connections, the waterproof box is ready to be connected to the panel.
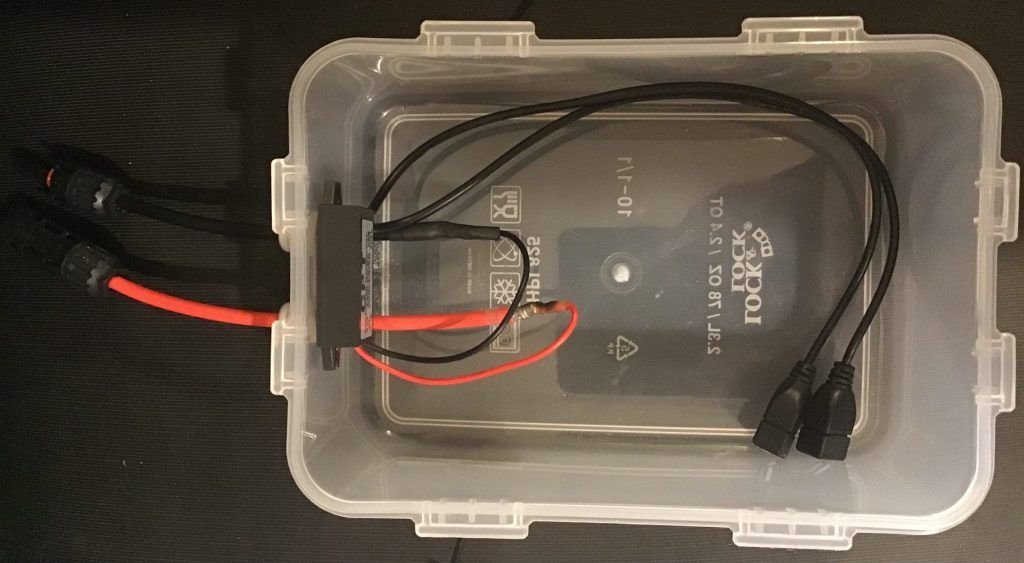
As you can see, I glued the adapter to one wall of the box with double-sided adhesive to have more space inside.
The solar panel has one meter of cable. We collect it using plastic cable ties so that the waterproof box, connected to the panel, is positioned at the end of the panel itself. The result is this.
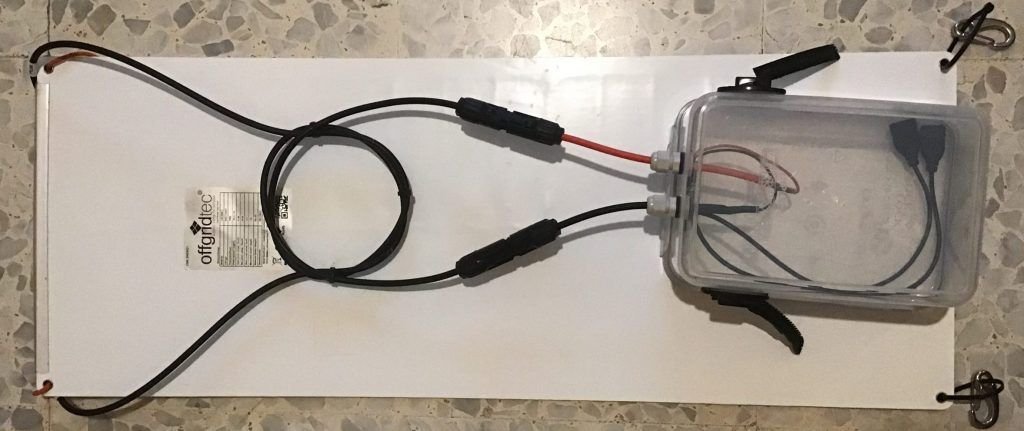
Our kit is ready. But now we have to find a way to mount it on the kayak deck and secure it to prevent any detachment while paddling.
Solar kit mounting on kayak deck
We can mount our panel on the bow or stern of the kayak. On long trips, the bow deck is usually almost entirely occupied by the spare paddle and moreover, it is the part of the kayak that sinks more. The most logical solution is therefore to mount it on the stern . But where? Certainly not close to the cockpit as it is a paddle maneuvering area and a lift point in case of self-rescue. Proceeding towards the stern we still find the hatch of the rear locker. If we fix the panel here, we will have to unmount it whenever we need to access the locker. I don’t recommend it. It remains the most extreme stern area, almost never used to fix objects on deck and for this reason almost always free. It is here that we will have to install the solar panel. How to do it though? Often the deck in this area is very narrow (it goes tapering as you get closer to the stern) and is not flat. We will therefore have to fix a flat panel on a curved and narrower surface of the panel. The challenge appears quite difficult and also depends on the shape of the stern of your kayak. So I don’t have the solution for all kayaks but I can tell you how I solved it on mine, the Seabird Scott MV. You can take a cue to find the most suitable solution for your kayak.
I chose to fix the panel over the waterproof box and to fix this on the deck with a reversible fixing system.
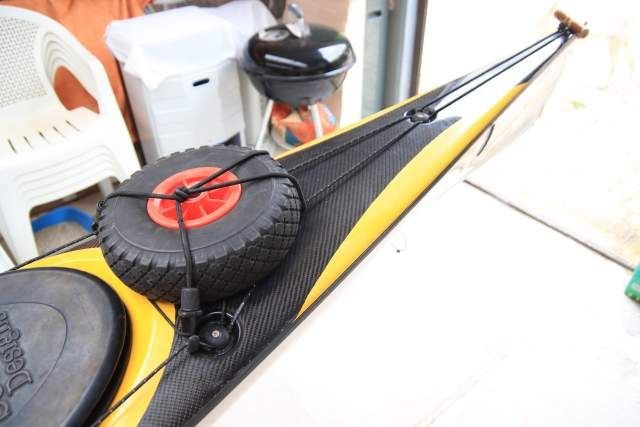
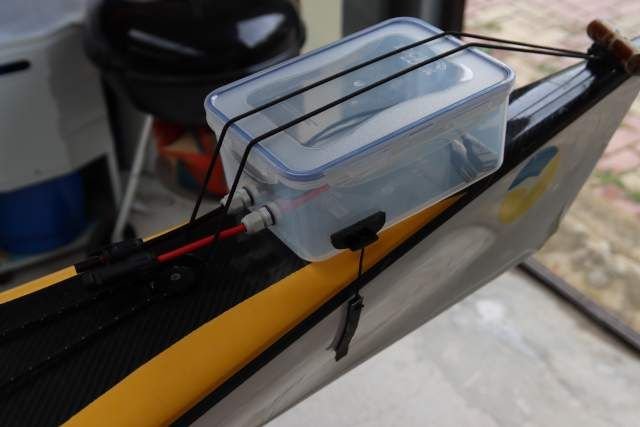

I used a reclosable fastener lock system: the 3M Dual Lock . The cost of a roll is € 16.
The wateproof box is fixed to the stern through two Dual Lock strips that prevent rotation due to the small, non-flat surface on which it rests. Two strips are glued on the hull and the other two are connected to the box by means of small ropes anchored to adhesive plastic plates positioned on the walls of the box (there were no other anchoring points). I made the plastic plates by cutting the GoPro adhesive backing lengthwise.
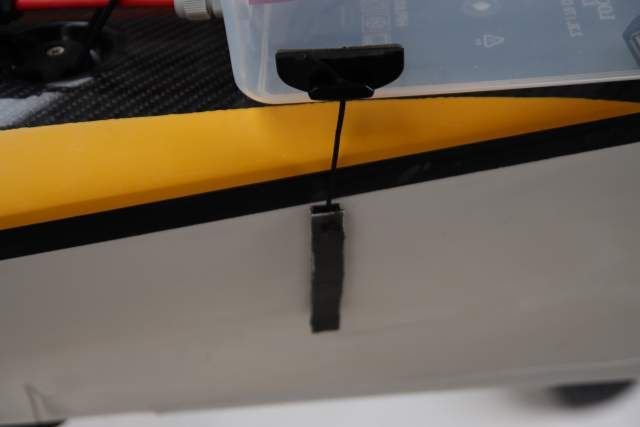
The elastic cords keep the box stationary just enough to prevent it from moving. It is important to block the rotation of the box as the lateral action of the wind and water in the event of overturning are exerted on it.
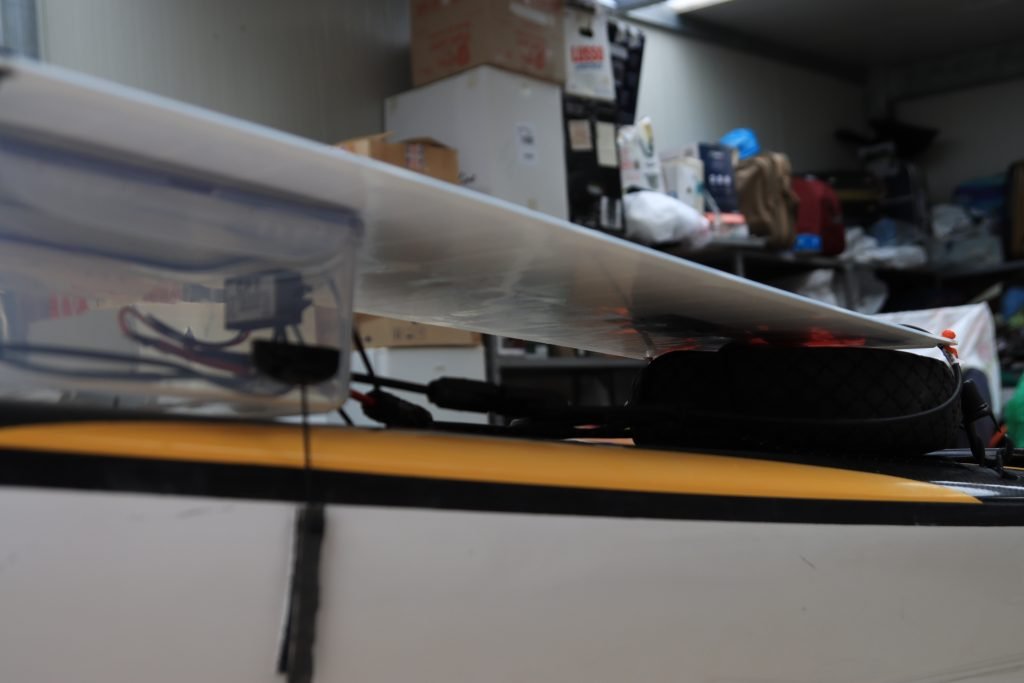
The panel rests on the waterproof box and on one of the trolley wheels, positioned under the elastic cords just behind the hatch of the locker. Those who make long kayak trips cannot do without the trolley. The two wheels take up a lot of space in the lockers and the best way to transport them is on the deck.
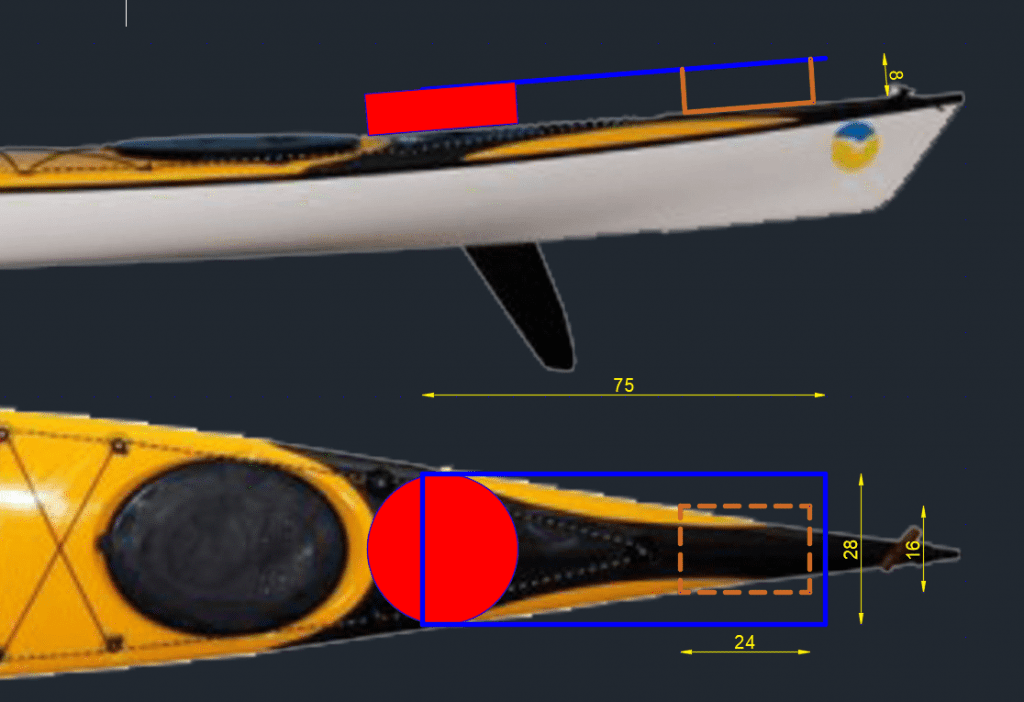
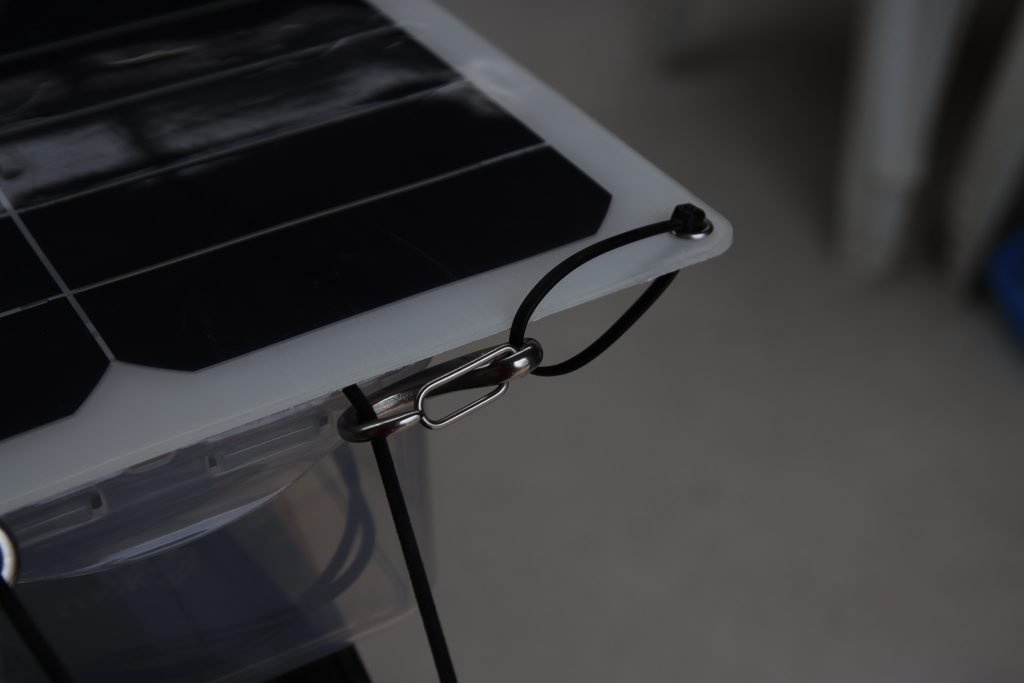
By attaching to the eyelets of the panel some small cords with hooks that cling to the elastic cords on the deck, I fix the panel by making it rest on the waterproof box and on the wheel. It is very important that the panel can move, as it often happens that it hits a rock, another kayak or a buoy. In this unfortunate case it does not suffer any damage because it moves to then return to its original position. The waterproof box behaves in exactly the same way thanks to the semi-rigid fixing system. I will post some pictures of the assembled system and the panel fixings.


Contact protection from moisture
Although theoretically the waterproof box is protected from the ingress of water, moisture may still form inside, due to the imperfect sealing of the o-ring, because it is dirty, or to the humidity present on our hands when we open it. It is therefore advisable to take precautions against this occurrence and protect the uncovered electrical contacts. These are present in the USB output ports of the adapter and in all the input and output ports of the power-banks . There is a product on the market that is right for us, H2OFF Electric . The cost is € 21.

From the description we read that:
moisture protection for electrical and electronic equipment . Liquid insulating spray (oily). To protect electrical and electronic equipment from humidity, oxidation, short circuit and electrical dispersion. Has excellent waterproof capacity, anticorrosion, and lubricants.
The duration of the protective film on the contacts ranges from a minimum of 1 year to a maximum of 3 years.
Before each trip, therefore, it is advisable to use it by spraying it on the adapter USB ports and on all the input and output ports of the power-banks.
A further trick we can use is to put an absorbent microfibre cloth on the bottom of the waterproof box . In the unfortunate event of copious entry of water it could save us from an authentic disaster, caused by the entry of water into the power-banks.
